Quickly correct the mold with laser scanning
Hy-Ten Plastics is a $5 million annual injection molder in Milford, New Hampshire. The company encountered difficulties in molding the outer casing of the dog collar signal sensing system, the DogWatch System 3000. The housing of the dog collar sensor and signal receiver consists of two parts, and Hy-Ten Plastics uses high-flow PC (polycarbonate) to inject the housing. In the injection molding process, the biggest challenge is to form four plastic parts in one time with a 2×2 combination mold. Therefore, the two pairs of half-shells are required to be perfectly matched, and the electronic components are provided with a waterproof seal by ultrasonic welding. According to Craig Heinselman, Quality Assurance Manager at Hy-Ten Plastics, the geometry of the product is so complex that the shrinkage of the molded product is extremely uneven and difficult to predict. Such irregular shrinkage often results in the two half shells not being able to fit tightly. Therefore, the only way to solve this problem is to make a sufficient prediction of the amount of shrinkage that can occur in the product when designing the mold, and then correct the mold to obtain a dimensionally accurate part. Through early testing, Hy-Ten Plastics eliminated the effects of process parameters such as raw materials, mold cooling, mold filling time and speed, and filling pressure on shrinkage, focusing on the core or cavity design of the mold. Since the flow simulation operation using CAD/CAM software can only predict the effect of shrinkage on the size of the article, it is not possible to determine the extent of actual deformation of the article. Therefore, in order to determine the actual shape of the product, Hy-Ten Plastics used a coordinate measuring machine (CMM) to draw the shape of the product by measuring the position of the surface of the product bit by bit, and then with the ideal CAD model. The product was compared. By comparing the differences between the two, the designer can accurately determine the correction position and correction amount of the core or cavity size. Still, when dealing with a complex 3D contour, it often takes millions or even tens of millions of points to get the exact geometry, and it takes weeks to produce these points on the product. Even so, it is still unclear whether some of the points needed to produce an accurate surface model are missing. To this end, Hy-Ten Plastics turned to Laser Design. Laser Design used laser scanning technology to map the geometry of the product. In just five days, the company built a surface model for each sample with an accuracy of 0.001 in (1 in = 25.4 mm). Larry Carlberg, design services manager at Laser Design, said they use a non-contact, low-energy diode laser system to measure parts. When the laser beam emitted by the system is scanned onto the surface of the product, 15,000 to 50,000 points can be defined per second. Usually, the laser can plot between 10 and 20 million points, but an accurate analysis requires only 1 to 5 million points. For example, a two-sided scan can be performed on a 6 square inch surface area within 15 to 20 minutes with an accuracy of ±20 mm. When the plotted points are transferred to the Geomagic Qualify package provided by Raindrop Geomagic, the software generates detailed dimensional data for the product. Comparing this size data with the original CAD design drawing, and using these two data sources, a color difference map of the surface shape of the product can be drawn, and the color difference map facilitates the correction of the mold. Based on this color difference map, the mold maker spent nine days adjusting the mold. Finally, Hy-Ten Plastics made a new sample in six days. When using the traditional method, it usually takes several months and repeats expensive tests. After using this method, all the work is completed in only 20 days. For this, Carlberg said that laser scanning is only required. Infrequent time, high-quality product structure drawings can be obtained to help injection molders accurately understand the differences between samples and design intent. Although such laser scanning systems and their software are expensive, it is still cost-effective for molders to quickly and accurately modify the mold. Manual Grinding And Polishing Machine Save time during preparation and cleaning Manual Grinding And Polishing Machine,Buffer Grinder Machine,Grinding And Polishing Machine,Grinding And Lapping Machine TROJAN (Suzhou) Technology Co., Ltd. , https://www.trojanmaterials.com
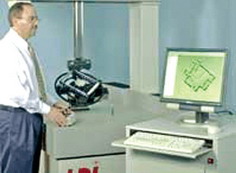
Laser Design's laser scanners can quickly and accurately map the surface of a product
Intuitive thin-film panel controls are easy to operate.
Quick cleaning features include retractable softener, disposable bowl-shaped lining and 360-degree flushing.
D disks are easy to replace.
Choose the best solution to meet the needs of the laboratory
Choosing 8 "and 10" size base discs optimizes sandpaper and diamond costs when larger units are not required